Vue.jsでreg-suitを利用したVisual Regression Testing

これは Vue.js #3 Advent Calendar 2017 - Qiita 1日目の記事です。
最近、お仕事でVue.js x SSRを使って開発を進めていた カラーミーリピート というサービスをリリースすることが出来ました。このサービスの開発を進めていく上で、とあるcssの修正が想定外の場所にも反映されてしまい、スタイルが崩れてしまう。という問題が時々発生していました。リリース前まではそれほど問題視してきませんでしたが、今後スタイル崩れに気付かずにリリースしてしまうのは非常に問題で、なんとか防ぐ方法を探していました。
先週末に東京Node学園祭2017が開催されましたが、そこで@QuramyさんのIntroduction to Visual Regression Testing の発表資料を拝見してreg-suitの存在を知り、これは求めていたものではないか!?ということで、Vue.jsのアプリに適用して見たので、紹介します。
reg-suitとは?
reg-suit は、スクリーンショットを比較して、差分をわかりやすくhtmlで表示できるツールです。見た目の変更が正しい変更なのか、想定外の変更になってしまっているのかというのは、人間の目で見て判断するしか方法がありません。それを助けるツールで、似たようなものには、Screener.ioやloki などが存在します。
reg-suit には、スクリーンショットを取る部分については、なにも提供されておらず自分で用意する必要があります。
Vue componentのスクリーンショットを取る
reactだと、storyshotsや、storybook-chrome-screenshotなど、storybookでcomponentのカタログを作り、それのスクリーンショットを取る便利なツールがあるのですが、どれも残念ながら今のところVue.jsには対応していませんでした。(Vue.jsはstorybookには対応しているが、画像にできない)
storybookスクリーンショットのVue.js対応は、また別の機会にがんばるとして、今回はstorybookではなく、karma + karma-nightmare を利用して componentのunit testで取ってみました。これは、今のお仕事でstorybookよりもunit testの方が充実出来ているというのも理由です。
vue-cliのinitからキャプチャを取るところまで、やっていってみましょう。
$ vue init webpack vue-reg-suit-demo

? Project name vue-reg-suit-demo
? Project description A Vue.js project
? Author tsuchikazu <huneyhunt77@gmail.com>
? Vue build standalone
? Install vue-router? Yes
? Use ESLint to lint your code? Yes
? Pick an ESLint preset Standard
? Setup unit tests Yes
? Pick a test runner karma
? Setup e2e tests with Nightwatch? Yes
ほとんどデフォルトですが、今回karmaを使いたいので、test runnerでは Jest ではなく karma を選択しています。Sampleとして HelloWorld component のunit testが test/unit/specs に作成されます。 このunit testを実行しても、テストを実行しているブラウザにはcomponentが描画されておらず、スクリーンショットが取れません。vue-test-utilsのattachToDocumentを使うと、簡単にDOMに出力して描画できるのでそれを使うように変更します。
$ npm install --D vue-test-utils@latest
diff --git a/test/unit/specs/HelloWorld.spec.js b/test/unit/specs/HelloWorld.spec.js
index 9021581..8a68f60 100644
--- a/test/unit/specs/HelloWorld.spec.js
+++ b/test/unit/specs/HelloWorld.spec.js
@@ -1,11 +1,12 @@
-import Vue from 'vue'
+import { mount } from 'vue-test-utils'
 import HelloWorld from '@/components/HelloWorld'

 describe('HelloWorld.vue', () => {
   it('should render correct contents', () => {
- const Constructor = Vue.extend(HelloWorld)
- const vm = new Constructor().$mount()
- expect(vm.$el.querySelector('.hello h1').textContent)
+    const wrapper = mount(HelloWorld, {
+      attachToDocument: true
+    })
+    expect(wrapper.find('.hello h1').text())
     .to.equal('Welcome to Your Vue.js App')
   })
 })
mountの処理がシンプルに書けるし、attachToDocument オプションをtrueにすることで、テストを実行するブラウザに描画されるようになります。 次に、karma-nightmareでscreenshotを取ります。コンポーネント/単体テスト単位でのvisual regressionテストを行うためのツールを作った話し - Qiita こちらを参考にしました。
karma-nightmareはkarmaからnightmareを立ち上げてnightmare上でテストを実行するランチャーです。nightmareはelectronのラッパーのなので、これでChromium上でテストを実行しつつ、capturePage APIを使用することでそのスクリーンショットも取ることができます。
やってみます。
$ npm i -D karma-nightmare
diff --git a/test/unit/karma.conf.js b/test/unit/karma.conf.js
index 8e4951c..1798520 100644
--- a/test/unit/karma.conf.js
+++ b/test/unit/karma.conf.js
@@ -11,7 +11,7 @@ module.exports = function (config) {
     // 1. install corresponding karma launcher
     //    http://karma-runner.github.io/0.13/config/browsers.html
     // 2. add it to the `browsers` array below.
- browsers: ['PhantomJS'],
+    browsers: ['Nightmare'],
     frameworks: ['mocha', 'sinon-chai', 'phantomjs-shim'],
     reporters: ['spec', 'coverage'],
     files: ['./index.js'],


diff --git a/test/unit/specs/HelloWorld.spec.js b/test/unit/specs/HelloWorld.spec.js
index 8a68f60..a9a13bd 100644
--- a/test/unit/specs/HelloWorld.spec.js
+++ b/test/unit/specs/HelloWorld.spec.js
@@ -1,12 +1,15 @@
 import { mount } from 'vue-test-utils'
 import HelloWorld from '@/components/HelloWorld'
+import { screenshot } from 'karma-nightmare'

 describe('HelloWorld.vue', () => {
- it('should render correct contents', () => {
+  it('should render correct contents', (done) => {
     const wrapper = mount(HelloWorld, {
       attachToDocument: true
     })
     expect(wrapper.find('.hello h1').text())
     .to.equal('Welcome to Your Vue.js App')
+
+    screenshot('./snapshot/HelloWorld.png').then(done)
   })
 })
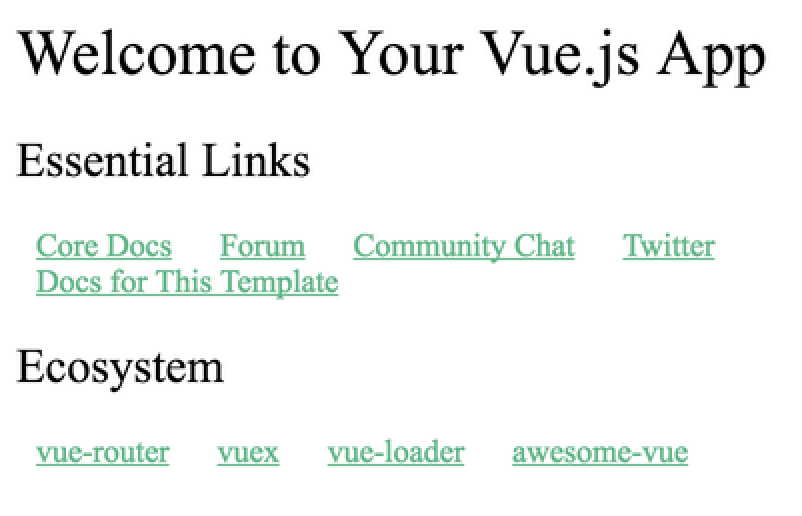
この状態でunit testを実行すると、snapshot以下にスクリーンショットが保存されるようになりました。
$ npm run unit

  HelloWorld.vue
    ✓ should render correct contents

PhantomJS 2.1.1 (Mac OS X 0.0.0): Executed 1 of 1 SUCCESS (0.032 secs / 0.02 secs)
TOTAL: 1 SUCCESS

$ ls snapshot/
HelloWorld.png
reg-suitの準備
ようやくスクリーンショットの準備が整ったので、いよいよ本題の reg-suit です。 reg-suit は plugin で s3 と連携できるのですが、連携しないと完全に旨味がないので、事前にs3 full accessのaccess keyを取得して設定しておきます。
$ export AWS_ACCESS_KEY_ID=<your-access-key>
$ export AWS_SECRET_ACCESS_KEY=<your-secret-key>
では、install です。READMEの通りに reg-suit init を実行すると、質問されるのでそれに答えるだけで、設定完了です。
$ npm install -g reg-suit
$ reg-suit init

[reg-suit] info version: 0.6.0
? Plugin(s) to install (bold: recommended)  reg-keygen-git-hash-plugin : Detect the snapshot key to be compare with using Git hash.,  reg-publish-s3-plugin : Fetch and publish snapshot images to AWS S3.
[reg-suit] info This project does not have local installed reg-suit, so install it.
[reg-suit] info Install dependencies to the local directory. This procedure takes some minutes, please wait.
? Working directory of reg-suit. .reg
? Directory contains actual images. snapshot
? Threshold, ranges from 0 to 1. Smaller value makes the comparison more sensitive. 0
[reg-suit] info Set up reg-publish-s3-plugin:
? Create a new S3 bucket Yes
[reg-publish-s3-plugin] info Create new S3 bucket: reg-publish-bucket-0b87fa35-0d51-4670-b4d1-4657848c841e
? Update configuration file Yes
? Copy sample images to working dir No
[reg-suit] info Initialization ended successfully ✨
[reg-suit] info Put your images files into /Users/tsuchikazu/src/github.com/tsuchikazu/vue-reg-suit-demo/snapshot.
pluginの選択では、今回は、
- reg-keygen-git-hash-plugin
- reg-publish-s3-plugin
を選びました。最低でもこの2つがないと、よくわからないツールになるので、選びましょう。勝手にs3に bucket も作ってくれて、これだけで準備完了です。 今の状態で一度 reg-suit run を実行して、変更前の比較対象となるスナップショットをs3へアップロードしましょう。
$ reg-suit run
[reg-suit] info version: 0.6.0
[reg-suit] warn Failed to detect the previous snapshot key
[reg-suit] info Skipped to fetch the expeceted data because expected key is null.
[reg-suit] info Comparison Complete
[reg-suit] info    Changed items: 0
[reg-suit] info    New items: 1
[reg-suit] info    Deleted items: 0
[reg-suit] info    Passed items: 0
[reg-suit] info The current snapshot key: 'xxxxxxxxxxxxxxxxxx'
[reg-publish-s3-plugin] info Upload 5 files to reg-publish-bucket-0b87fa35-0d51-4670-b4d1-4657848c841e.
[reg-suit] info Published snapshot 'xxxxxxxxxxxxxxxxxx' successfully.
[reg-suit] info Report URL: https://reg-publish-bucket-0b87fa35-0d51-4670-b4d1-4657848c841e.s3.amazonaws.com/7eb220085a17c35eb0536ba3bf78bbf7574c53b9/index.html
[reg-suit] info Skipped to notify result because notifier plugins are not set up.
reg-suit run を実行することで、以下が行われています。
- 比較対象として、before の画像を取得(今回は初回なのでなし)
- before の画像と、今ローカルにある画像を比較
- 比較結果をhtmlにまとめて、s3へアップロード
- 今のローカルにある画像を、アップロード(コミットハッシュをキーにしている)
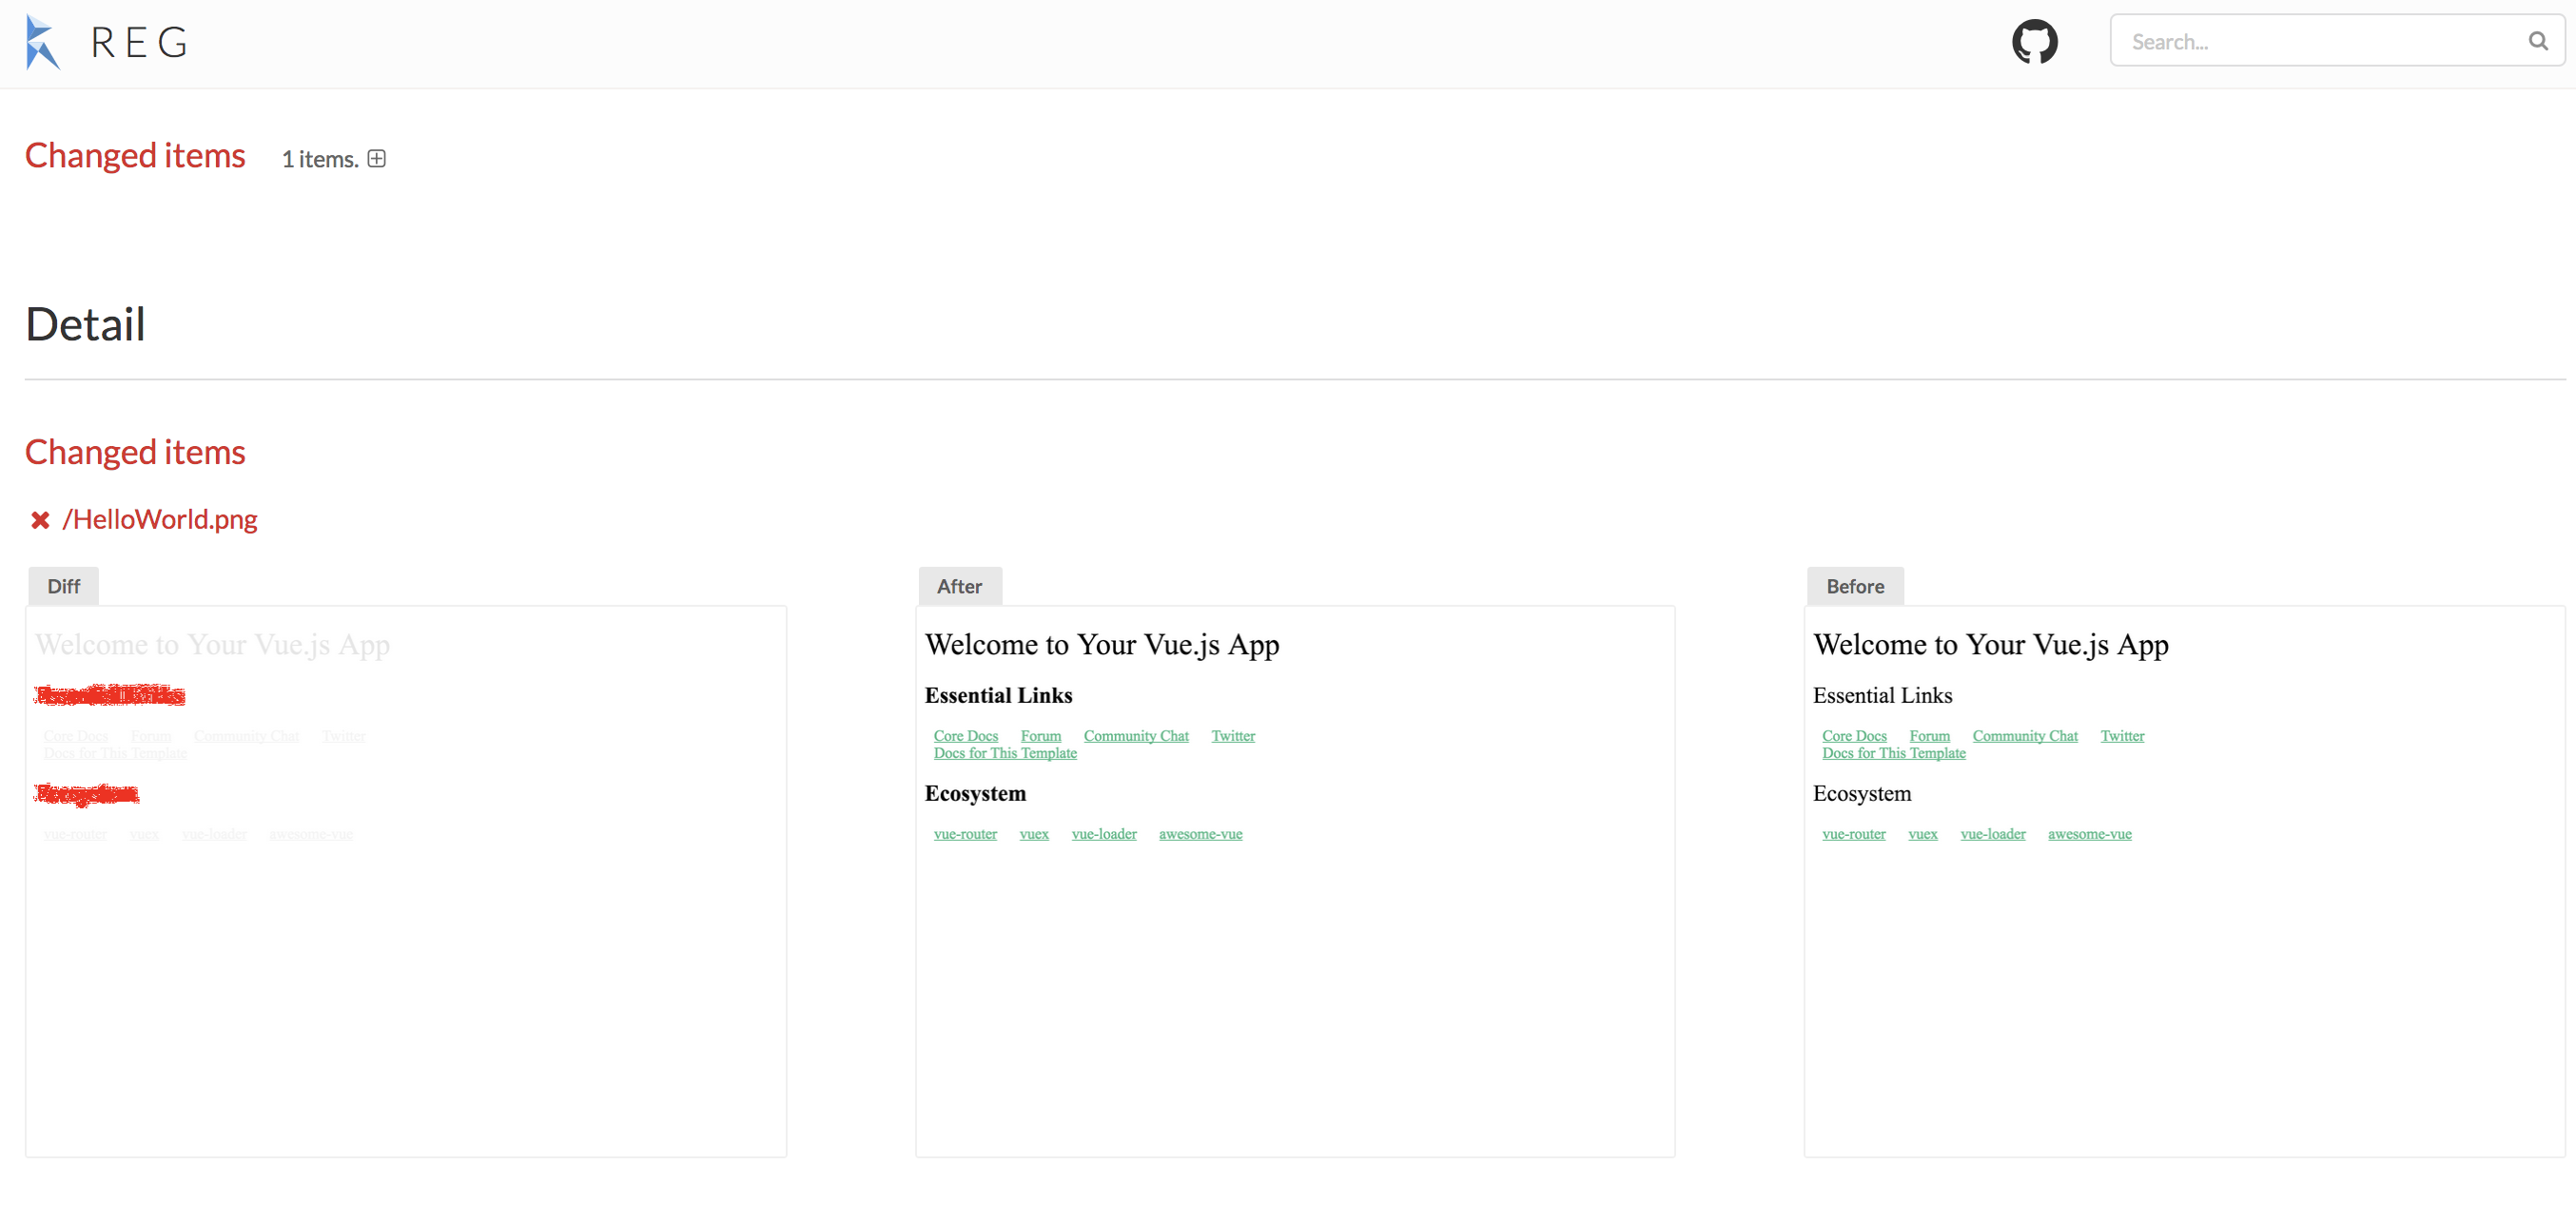
初回の比較結果はこのような形で、比較対象となる画像が追加されました。
branchを作って変更後にreg-suitでVisual Regression Testingだ
branchを作って、cssの変更をして、unit testを実行し、コミットします。今回は一部太字に変更しました。
$ git checkout -b feature

diff --git a/src/components/HelloWorld.vue b/src/components/HelloWorld.vue
index 7c17dd6..c5a6fce 100644
--- a/src/components/HelloWorld.vue
+++ b/src/components/HelloWorld.vue
@@ -36,6 +36,9 @@ export default {
 h1, h2 {
   font-weight: normal;
 }
+h2 {
+  font-weight: bold;
+}
 ul {
   list-style-type: none;
   padding: 0;

$ npm run unit
$ git commit -a -m 'fix font weight'
そして、reg-suit run を再度実行してみると、
$ reg-suit run
[reg-suit] info version: 0.6.0
[reg-suit] info Detected the previous snapshot key: 'xxxxxxxxx'
[reg-publish-s3-plugin] info Download 1 files from reg-publish-bucket-0b87fa35-0d51-4670-b4d1-4657848c841e.
[reg-suit] info Comparison Complete
[reg-suit] info    Changed items: 1
[reg-suit] info    New items: 0
[reg-suit] info    Deleted items: 0
[reg-suit] info    Passed items: 0
[reg-suit] info The current snapshot key: 'xxxxxxxxx'
[reg-publish-s3-plugin] info Upload 7 files to reg-publish-bucket-0b87fa35-0d51-4670-b4d1-4657848c841e.
[reg-suit] info Published snapshot 'xxxxxxxxx' successfully.
[reg-suit] info Report URL: https://reg-publish-bucket-0b87fa35-0d51-4670-b4d1-4657848c841e.s3.amazonaws.com/8594763afe5b77a5ec640572a369c7edce42268a/index.html
branchを作ることで、 自動で分岐元を before の比較対象としてくれます。
- branch の分岐元時点の画像をDLして before とする
- branch 分岐時点の before 画像と、今ローカルにある画像を比較
- 比較結果をhtmlにまとめて、s3へアップロード
- 今のローカルにある画像を、アップロード (ここからまた branch が切られたら、アップロードされた画像が before として使用される)
github と連携する
github と連携することで、PRにコメントで比較結果を通知することが出来ます。 reg-notify-github-plugin の手順通りにやればすぐに導入できます。
$ npm i reg-notify-github-plugin -D
$ reg-suit prepare -p notify-github
# あとは案内に沿って、ポチポチして、client IDをコピペするだけ
先程のcss変更がある状態でPRを作り、reg-suit run を実行すると、このようなコメントが追加されるようになりました。便利〜。 https://github.com/tsuchikazu/vue-reg-suit-demo/pull/1
まとめ
スクリーンショットの取得方法は、プラットフォームやFW、テスト方法など、いろいろな方法があります。reg-suit はそこには関与せず差分チェックに特化することで、どんなWebサービスやネイティブアプリにも適用できる汎用性を持っています。また、github連携のプラグインで、開発フローのレビューに取り入れることができます。 この設計思想や、プラグイン機構の仕組みがかなりよくて、顧客が本当に欲しかったものはこれだったのでは?という気持ちです。もう感謝しかありません。 また、導入が本当に楽ちんなので、ぜひ reg-suit で Visual Regression Testing を始めてみてください。
明日は、hanamasa0201 - Qiita さんです。

